Showing posts with label sewing. Show all posts

Wednesday, January 30, 2013

Pillows: You can do this!

Yesterday afternoon I sewed my first real thing this year- pillows! Actually, I have only sewn a couple of things since Halloween when we closed on the new house, which was months ago. It sure was nice to be back at the machine.

Here was the basic chain of events:

1. Realization that the pillows on the front bench look like this:

Yuck! (In case you can't tell, they are very badly faded and damaged from being outside.)

2. Made decision that these pillows need to be fixed RIGHT NOW. (Sadly, this was actually on Monday evening, after dark. I have a pretty strict rule of not going outside in the dark alone. It has to be a pretty big reason to break this rule OR the hubs has to be home to protect me. I may be too old to be afraid of the dark, but I am anyway, so there. Instead of getting the old pillows, I decided to rummage through my gobs of fabric for options.)

3. Daylight= access to pillows. Got them. Measured width and length.

4. Cut fabric and inch longer on each side than the measurement I got in step 3.

5. Sew. Stuff. Sew.

6. Run out to porch and place pillows. Step back and admire.


For these pillows, I basically used the old pillows as a pattern and reused their filling, so the whole project has cost me less than the price of a yard of material (which I probably paid about $6 for). I have four more outside pillows to recover, and next time I should take some pictures so you can repurpose your old pillows too. Would you be interested in seeing those?

I probably spent less than an hour from choosing the fabric to actual sew time, if you ignore that I had to wait for the sun to come up. You can do this project too and spruce up your outside spaces with minimal cost.

For you experienced in the art of sewing, you know that the basic pillow is not to be feared. In fact, I probably have 10 yards of fabric waiting to be transformed into new pillows and valences for the new house. They just require time and patience.

If you are new to sewing, pillows are a great place to start! There are a few simple tips and techniques you need to know, and you will be creating your own pillows in no time. 

Are you interested in a tutorial on making these pillows? 

-Carrie

Friday, June 29, 2012

What's Up at HappyLittleMonkey?

It's been a great summer at HappyLittleMonkey!  Besides that I love being on my own schedule (ie. no school drop off), the kids and I have been having lots of fun together.  So far, the big things we have done are taken trips to Disney World, celebrated my daughter's 5th birthday, and completed swim lessons. We've also started bowling as a family and have had fun playing with our friends.  (More posts on these activities are planned too!)

As HappyLittleMonkey, I launched my new site, added some new products, and have had lots of repeat customers (which really warms my heart!).  

If you are looking for gift ideas, or maybe a fun sewing project, here are some pictures of what I have been up to.

Happy Friday!

Monogrammed Newborn Gown
Diamond monogram in light blue
Monogrammed bloomers in white with added scroll
(Love these as a great basic to go with everything!)
Bloomers in Classic Scroll in Medium Pink, as well as the white.
These were gift sets someone ordered!  Functional and fun!
NEW! Custom 4 Piece Newborn Gift Set
(Classic Scroll and Script Monograms in light pink)

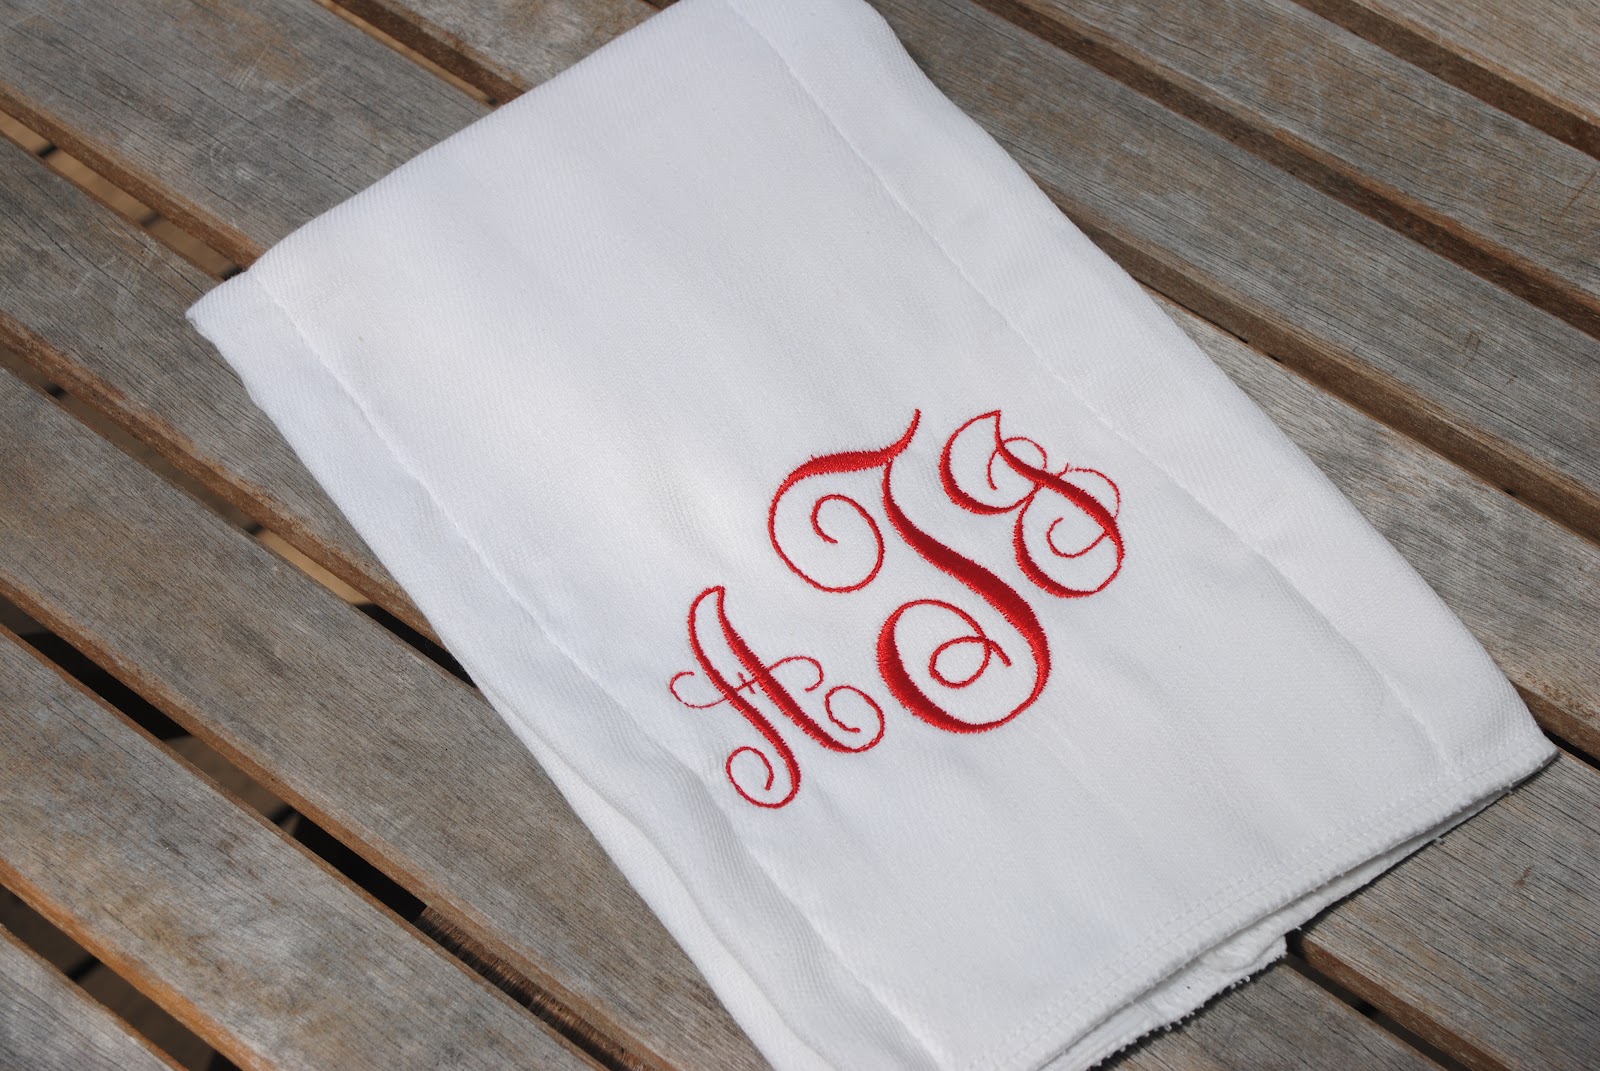
Monogrammed Diaper Style Burp Cloth
Classic Scroll in red thread

Sewing Class Dress Sample
Classic A-Line Dress Class: Part 2
Adding ruffles, pockets and reversible!
Follow me on Facebook for class schedule
Perfect Twirl Skirt Tutorial- Easy and Lovely!

Tea and Cookies as Party Favors

Custom Newborn Gift Set featuring a Bee!  

Newborn Gown with Classic Scroll Monogram in light pink

Linen Sleeveless Dress and matching Bloomers
Classic Scroll in light pink

Newborn Gift Set in light blue
Engraved Jewelry Added to the Shop!
On SALE through Sunday
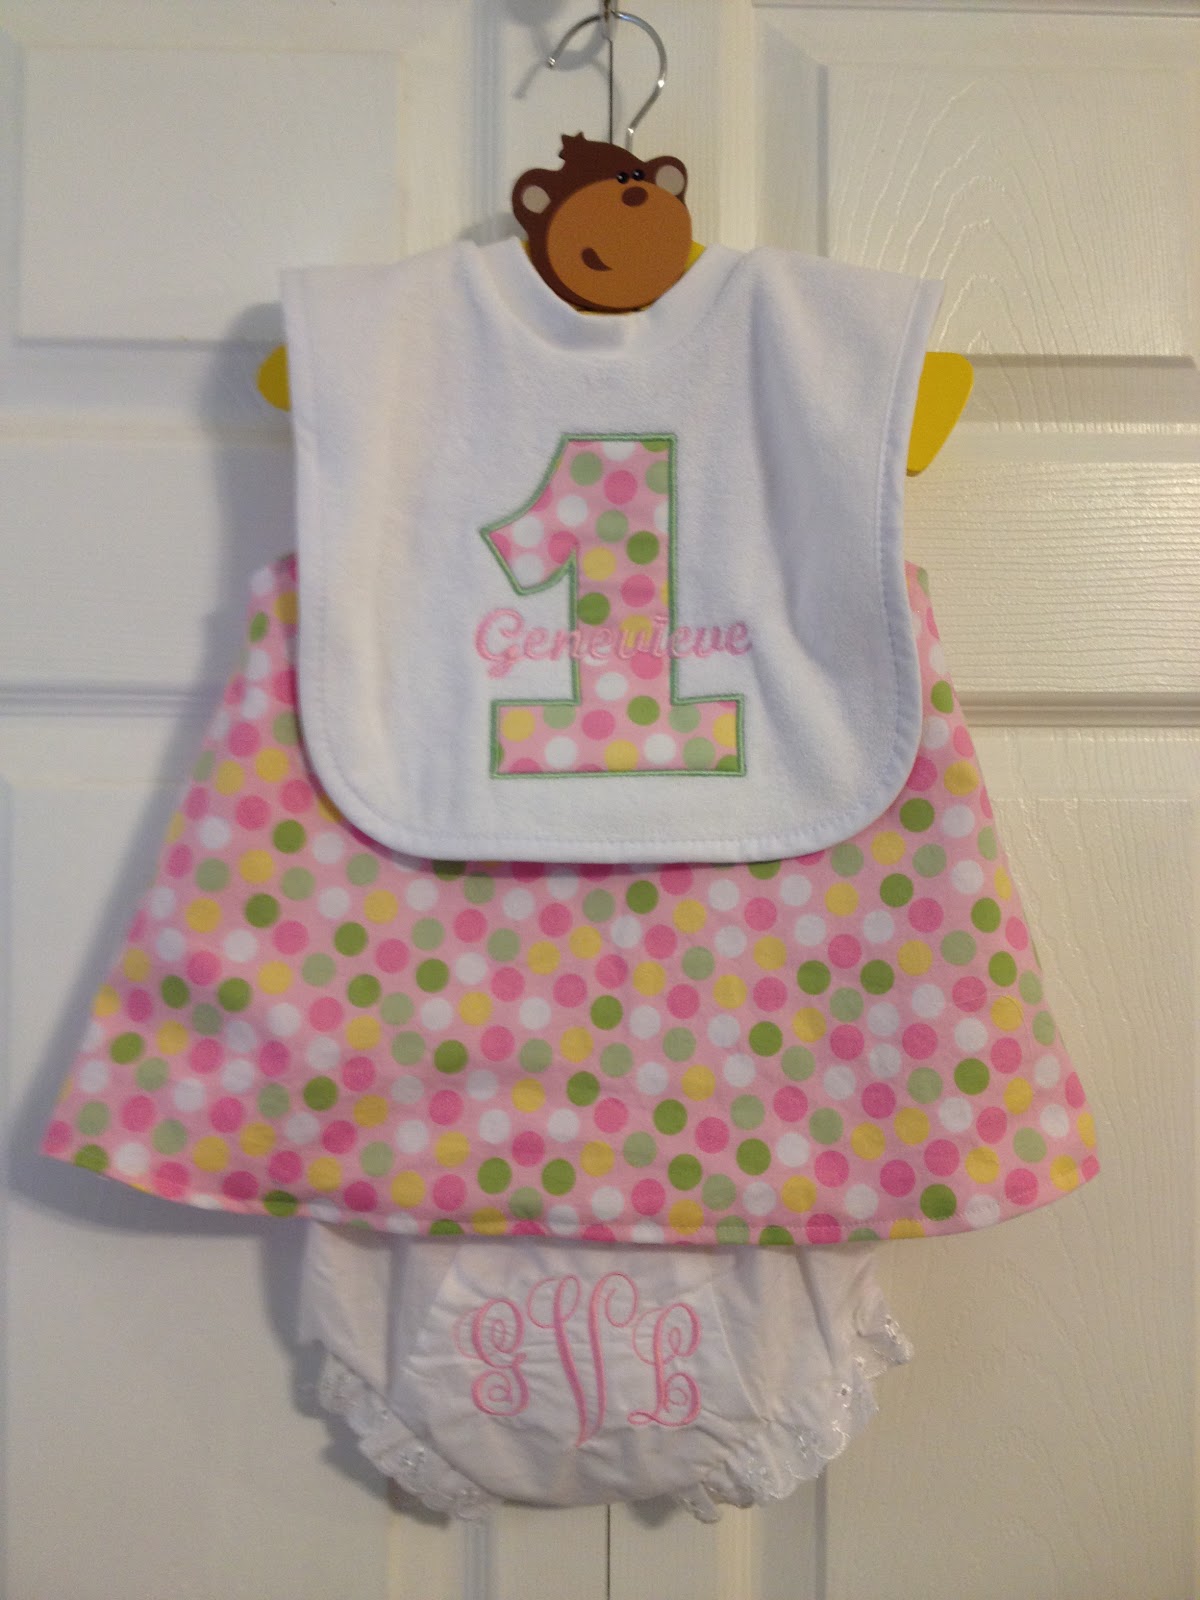
Custom First Birthday Set
#1 Birthday Bib, Bloomers, and Reversible
A-Line Dress

Monogram on the Dress

For help creating your own custom gifts, please email me and we can get to work creating your items!

Happy Friday!  Thanks for checking out my pics and for your support.  It means lots!

Friday, June 15, 2012

Awesome Spinning and Twirling Skirt! Pinned it and Did it

Who doesn't need super-cute summer skirts for their little girl?  A few months ago I collected a few DIY skirt tutes on Pinterest and I finally made one.  It was called the "Circle Skirt" but my daughter calls it her "Spinning Skirt." (Actually, it usually comes out "Sfinny Skirt"but I thought you may not be able to translate that last remaining vestige of her toddler lisp.)

This Pin by Made is quoted in multiple tutorials and after digging around on her blog, I can totally see why.  She has some really fun tutorials all over the place.  (insert the"Danger, Batman!" warning to anyone who loves good DIY tutorials that don't require purchasing anything)

Here is the link to her tutorial.


Armed with that Pin, some awesome knit fabric, 1.5" wide elastic, and an unplanned Saturday evening, I was able to tackle the mathematics, make a pattern and....drumroll.....a skirt!

Ta da!


Can you tell how much she loves the twirl power of this skirt?

For the most part, I followed her tutorial.  The math involved is easy and worked great. My fabric was a directional print (meaning all the little rainbows went the same way, so I had to cut two pieces and sew them together to make the circle.)  For fabric, I chose a knit, and although knit wasn't on her suggested fabric list. It worked great though.  The only other thing I did that she didn't do on her skirt, was to zig zag stitch over the elastic seam to provide a little extra durability and to make the elastic lay flatter.  Just be careful when you sew fabric to the band as it is a little thick in that spot and you don't want to break a needle.

I have now made five of these skirts and have a few more cut out.  They easily take less than an hour.   On the last one I made, I zig zag stitched the elastic to the fabric and was happier with the result than the straight stitch because I find it hard to sew perfectly straight lines and tug on the elastic.

5th Birthday at Walt Disney World Outfit!

Cinderella-inspired Cotton Costume with Twirl Skirt
I covered the waist-band on this one so I didn't have to dye the elastic to match. 
A side note on knits: Lots of people are afraid of knits since they can take a little more patience to cut and require a little finesse when you sew them.  However, I challenge you to conquer your fear of knits and try them.  Just pull on the fabric a little bit as you sew it to another piece and they will come out wonderfully.  It is actually a very forgiving fabric to sew with.

Happy sewing!

(And if you end up being inspired to make one, or ten, please let me know!)

On Pinterest:


Monday, February 27, 2012

Newest Member of My Crew

This past weekend, I adopted this beauty:


She's a Singer 301A, born in 1956.  She is so cute and I cannot wait to do whatever I can to get her fully operational.   This machine is solid metal, baby, and comes from a time when the Singer was the go-to for anyone wanting to make home sewing easier and more enjoyable.

Yes, I am totally geeking out on this machine.  I spent the majority of my Friday evening researching the history of this machine and sewing in general and I'm still excited about all the things I have learned.

In case you were wondering about the history of sewing too, I thought I would summarize the coolest things I learned:

- This machine is said to have "revolutionized the sewing machine of tomorrow making home sewing easier and more convenient."  Looking at this beauty compared to my newer machine with all of its bells and whistles (like a gazillion stitches and built in computer), it made me chuckle a little to think that a machine that only does a straight-stitch and weighs 16 lbs in all of its solid metal glory was revolutionary and I was just picturing the happy housewife picking out her brand new, state of the art machine.  It just made me want to put on an apron.  
- Isaac Singer built the first commercially successful machine in the 1850's, and he used the up and down stitch invented by Elias Howe. However, he had not asked Howe if he could use his patented idea so he was sued and Howe won and was paid royalties by Singer (resource).
- Home machines weren't designed and marketed until 1889, electrical machines were being used by 1905.
- Years before Singer, a frenchman, Barthelemy Thimonnier was granted a patent for a sewing machine in 1830.  It was made of wood, used a barbed needle, and was designed for embroidery but then he realized it could potentially be used for sewing.   He was able to get a contract to build more machines and make uniforms for the French army.  He was able to amass 80 machines before a mob of Parisian tailors destroyed his factory and made him flee for his life because they were worried they would be put out of work by his machines.  He fled to England with the one machine he was able to save.
- There are several other attempts to make machines and machine parts between Thimonnier and Singer that you can read more about here or here.
- Singer is also credited with being the first to offer customer payment plans and machine service with sales.

New features of the Singer 301A (This site compares the 301A with its predecessor, the Featherweight):
- Slant-needle.  Even today's traditional machines have a vertical needle shaft.  The slant-needle is supposed to make sewing easier to see and more fun.
- Modern-stream lined design.  The design of this machine is practically the same of the new ones we buy today.  The model made before this one had the traditional old machine look.
- Carrying handle.  This machine has a carrying handle and can be used in a cabinet or is portable.

I need to get her a new bobbin case and hopefully just a little oil and some more research on how she works will have her up and running in the next couple of weeks.  I am thinking she will be my go to machine for tagging and small projects.

Thank you for indulging me geek-dom.  If you appreciated learning something new on a Monday, please let me know.


Saturday, July 9, 2011

Sewing for the NICU

I am SOOO excited!

Last December, my great friend, Justine of HandmadeByJustine, and I got together and made a bunch of baby hats to donate to the NICU. They were adorable and we felt so great making them. Although I kept wanting to do something for the NICU, it was Justine who actually found out what we could do and got the project started. Here is a pic of the hats we made.


Since then, I keep wanting to do even more. A little over a month ago, another friend, Kristen, said that she wanted to make things for the NICU. It was just the "backup" I needed to get a plan rolling. Now, I have called the NICU; found a place where more than two people can easily meet to cut, sew, and create; and I'm starting to collect material donations. So fun! This time, the project is even bigger.

Here is what our NICU needs:
Isolette covers (10-20)
Swaddling blankets for the tiny babies (12" x 12", 18" x 18", and 25" x 25"- as many as we can; I've set a goal of at least 10 of each size)

I'm hoping that we will have minimal out of pocket expenses and this project gives so many people a chance to get involved.

We are collecting used baby blankets from our friends and will upcycle them into the items the hospital needs. We also need dark fabric (old sheets will work as well as any old solid fabrics that you aren't using), quilt batting, serger thread, and bias tape.

As I have written about previously in March for Babies- Ready to get your shoes on?, our oldest kiddo was born nine weeks early and spent about a month in the NICU. What I didn't mention is that the staff at the NICU was wonderful and they really are amazing. Besides the people there, the handmade items we got to use while we were there really warmed our hearts. The fact that someone, somewhere who didn't know us or our baby, and had taken the time to make things for her to use was so touching.

I have several people who are ready to sew, cut, and donate. In the next week we hope to collect over 40 blankets so we can make them into items the NICU needs. If you are local and want to get involved, let me know. My email is happylittlemonkey (at) comcast (dot) net.

A special thank you to Lynn from the Bernina Connection for letting us use their wonderful sewing space for this project. We really appreciate it. If you sew, quilt, or want to learn how, please check out this great local resource.

Please wish us luck!

The picture on the left is Caroline in an isolette, 8 days old and right after a bath so we were so excited to get a picture of her without the tube.

The picture below is last week, at the zoo!


Monday, October 18, 2010

Made for Mondays: Mommy, my baby is cold!


THE PATTERN: McCalls Crafts M4338, Pants G and Top F

THE MATERIALS: less than a half a yard of flannel that let me down when I washed it so I couldn’t use it for the shop; a couple inches of velcro; a few inches of elastic, thread

TIME ELAPSED: About 45 minutes, with a three year old “helper"


As part of my series "Sewing My Way Through the Fabric Store," I am accepting challenges from you all on sewing projects, as well as sharing some of my personal sewing adventures!

This week's post is a challenge from my little girl, who provides inspiration for many of the things I sew. This story is from a couple Saturday mornings ago.

That morning started with quite a to do list of preparation activities for the weeks ahead. The hubs had taken our little boy to the hardware store, so our daughter and I were milling around the house. I had a million things I needed to sew to get ready for the start of the HappyLittleMonkey Craft Show Tour 2010 and the little guy's birthday party, but I was trying to be present with her and her “boy baby.” We had recently made him a swaddling blanket and today she said he needed a burp cloth. Burp cloths, I can do! We dug through the remnants and a few minutes later, we had a suitable burp cloth. Ok, that was fun.

Then came the title plea, "Mommy, my baby is cold."

Hmm...baby already has a swaddling blanket. So, that won't work. What else??? I considered telling her to go get an outfit out of her stash of store bought baby clothes, but this was "boy baby," so clearly a dress wasn't going to work.

So, what to do? It was off to the pattern stash. Found an outfit that could double as pajamas. Perfect! Next, found some flannel I had purchased for the shop, but didn't use. Check, check.

Ok, now, deep breath, collect the rest of the supplies and mentally prepare to sew with a three year old assistant.

Inhale, exhale, and...

We laid out all of the pieces and cut them out. (Details: McCall’s Crafts pattern, M4338. We cut out Pants G and Top F, without the collar.)

For sewing the pants, we followed the directions pretty closely. The only difference I did was to serge the ends of the fabric before hemming them instead of doing a little roll. Since everyone doesn’t have a serger, most patterns instruct you to fold 1/4 inch or so and then the next 1/2 inch and hem. Its just more time consuming and with my three-year old Assistant, time is in short supply.


I really liked the pants directions. On people pants, most of the time the pattern directs you to sew the front and back seams, and then creating a pocket for the elastic at the top. Doll clothes are small and can be a little harder to work with. This pattern directed you to only sew the front seam then sew the elastic pocket, insert the elastic, and then sew the back seam. So easy! I even placed the elastic in the pocket, sewed, and then pulled the elastic to the desired length (about 5 inches of elastic, relaxed).


The shirt was really easy too, especially without the collar. I put velcro up the whole back so that she will eventually be able to get baby dressed by herself.

Here is the final outfit.

Best was the big hug followed by "Mommy, thank you so much." Ok, so totally worth it!


Thursday, October 7, 2010

Can you make me a purse?


The PATERN: New Look #6574

The MATERIALS: 2 yards of heavy cotton, 2 yards of mediumweight fusible interfacing, thread, lots of pins


A new friend recently asked me to sew a purse for her and with minor apprehension, I agreed. We met for coffee and she handed over the goods- two yards of fabric and the pattern.


The pattern is adorable and also pretty simple to make. The most labor intensive part has been dicephering what the pattern maker meant by “mediumweight fusible” interfacing, since Joann’s doesn’t carry a product that exactly matches that description, followed only by making sure that the pattern and print on the fabric lined up properly so that when I sewed it together the print matches up properly. This last part may not be something you worry about, but I can be a little "detail oriented" and I hate when the pattern doesn't line up properly. I don't sew with many plaids for this reason.


Whenever I can, I roughly cut my patterns out with a rotary cutter, pin them to fabric, and then do a better job cutting both the fabric and pattern. I use rulers for straight edges because it makes the final product come out better.


With this post, I didn't start taking pictures at the very beginning. As I worked on this purse, I had a realization. I need these new challenges. I love making my blankets, but occassionally I need a new challenge and to test myself. So, I started taking pictures and decided to make a habit of trying more new things!


With all of the pattern pieces cut out, I headed to my "sewing room." First, I line

d up the fabric and the interfacing and ironed it. Then, began sewing.


The directions on this pattern were pretty good. I didn't have any major problems with them while sewing the top and side seams. Then came putting the bottom of the purse on. I was not looking forward to this part. "Dread" is actually the word that comes to mind. I read ahead through the directions to get an idea of what it wanted me to do. Then, I did a mental "argh." It calls for bias tape. I HATE bias tape.


Insert creativity.


I decided to do a French Seam instead of using bias tape. It is prettier and theoretically can be easier. So, from here out, I don't follow the pattern directions.


Resume affixing the bottom. The pattern has these little triangles on it which provide places to match up pieces later. These make putting things together very easy, but with the things I sew a lot of, I have stopped cutting out the triangles because it takes too long with the rotary cutter. I shouldn't have skipped this step with this pattern. I had to get the pieces back out and mark where they should have been. (In the picture you can see where I cut the triangles on the top pieces, but not on the bottom.) WIth pieces matched, I started pinning. I pinned it to death putting pins every inch or so. This helped.


To make a French seam, you start with wrong sides together (instead of right sides). With the pins in place, I made a 1/4 inch seam around the bottom. It wasn't the prettiest, since there is a lot of fabric at the corners, but this is going to be hidden in a minute, so its ok.


After sewing the first seam around the bottom, I trimmed off the excess and then turned the purse inside out. Then made another seam around the bottom which encloses the rough edges and hides them. The inside of the purse is black, so I couldn't get a good picture of the French Seam. (Here is a simple tutorial from Sew Mama Sew on seams)


Then all I had to do was turn it back to right-side out, and it was done! Finished product picture is above.


If I make more of these, I think I will redesign it a little to make the bottom a little easier. It wasn't that hard though to make it as the pattern designed. When I make another, I will take more pictures and document better to convey the steps to you.


Also, a little more about this fabric. We used thick cotton, from the Home Decor section. Danielle (the challenger) actually introduced me to this fabric about a year ago with her great clothing line called Pollyanna's. It is 100% cotton, and although most of it is labeled "Dry Clean Only" she started washing it. And with each wash it gets more character and charm. It also gets softer. Thank you, Danielle, for bringing this fabric to my life.

##


This concludes my first post of the "Sewing My Way Through the Fabric Store" extension of my blogging. I will continue to take on new sewing challenges. The number of patterns available is endless. At least once a month, depending on the availability of people who want me to try to make something for them, I will make a new pattern. Then, I will post about the experience and the product, offering tips on that pattern and potential hazards.

So, bring on the next challenger. Email me (HappyLittleMonkey@comcast.net) if you are interested in offering a sewing challenge. The challenger will choose a pattern, the fabric and needed materials, and I will sew it up for free.

Next challenger, my daughter with, "Mommy, my baby is cold."

Comment from the Challenger:
From the "challenger,"....I LOVE my purse and gets scads of compliments daily. It is the perfect size for all of my stuff and wears so well. Everyone should have one of these! Thank you Carrie...........you are AWESOME. There are plenty of amazingly beautiful home decor fabrics to pick from to "fit" your style too!

I interrupt this blog!

Several people have asked me for custom items and special orders since I shared that I can sew, and it is flattering. Then there is my little girl, who inspires new sewing adventures all the time. She usually starts with a problem and then says, "Mommy, puhleeeaze!" How can I say no? After all, she probably won't think that I hang the moon forever. These occassions have helped me to take a break from the normal, appreciate sewing, try new things, and challenge myself.


A few new products have even ended up in the shop this way, like the Classic bib (thanks, Heather) and the custom pillowcase (thanks, Michelle).


So, I am going to start sharing some of my sewing adventures in a series I am calling “Sewing my way through the fabric store.” It will mostly feature different patterns and my attempt to follow them. Generally, I view patterns like view recipes, they are guides for inspiration. I don’t know that I have ever followed every step to the letter, but between the guidelines is where creativity lives!


I hope to have at least a monthly challenge, where a friend picks out the pattern and fabric and asks me to create it. Inbetween, I will share patterns that I choose. Each pattern will include information on the pattern and materials required, my comments on the pattern directions (which sometimes can be greatly lacking in detail or overcomplicated), and pictures.


Like collecting fabric, I also like to collect patterns! So I have built up quite a stash. Whenever there is a sale on them, you can bet that I have at least stopped by and scoped out the available choices and added a few to my pattern library.


My first post is "Can you make me a purse?" It's coming up next

Friday, September 10, 2010

Where did HappyLittleMonkey come from?

The HappyLittleMonkey formed from my need to support my addiction, fabric, and a need for something "else." I think the HLM has mostly fed my addiction, but that is beside the point. I LOVE fabric and think I always have. As a kid, I didn't carry around some little blanket, instead I dragged around a comforter. So my addiction plus my need to find something for "me" while I am staying home with my kids equated to a need for an outlet. And to me it seemed like forever that I milled over this concept in my head and then, almost overnight, I had a concept, a name, and a store.

HappyLittleMonkey has focused mostly on baby blankets. The majority of my inventory is Swaddling Blanket Sets that you can ACTUALLY use to swaddle a baby. The big store ones always seem to shrink up into rectangles and don't even start as large enough to even wrap around a kid. Besides, the gifts I loved the most were the ones people chose especially for us. Something I wouldn't have thought to buy for myself. The boutique style gifts that Moms want to keep in their purse to show off to their friends. I wanted to make things that people will love.

Wednesday, September 8, 2010

Inspiration!

So, I have been searching for it. I have been wanting to blog, and I keep dabbling here and dabbling there to find something that will fit. Finally, today, I have it! I will talk about our adventures in parenting and crafting. Maybe even a little of how things we parents use and try out can be better! And yes, I will apologize in advance, because there will be plenty of butchering of our language.

Truth be told, I thought I would be a lawyer or a teacher (sortof a lawyer, just of a defined group of people), so the thought of giving things "trials" is pretty natural to me. I never thought I would be sewing for fun AND for other people. I have had a machine for as long as I can remember, and would dabble with things along the way, but it wasn't until my own child was born that I felt that I HAD to sew. Not in a bad way, it was like something I needed to do. My mother always sewed for us- holiday outfits and especially Halloween costumes. Oh, the costumes! They were beautiful and treasured. My daughter's first Halloween, she needed to be a ladybug. Oh, the pictures I was going to take! I just couldn't find a costume that in any way, shape, or form did the ladybug its proper due. So, I busted my old machine out of its case and fired it up. Amazing! The costume came out how I pictured it, also amazing. Then, in true "first-time Mom over the top" form, I decided at the last minute that the hubs and I needed costumes too. By last minute, I mean Halloween day. So I made him go the costume store to find something. He got me a bumble bee and he was the Bug Catcher. It truly was cute. I digress.

Now I was back sewing and having that machine all fired up just brought back so many memories of the great things my mom would make. The machine even made the room smell like when Mom would sew. It was great.

A couple of months later, I had just gone back to work, put my baby girl in daycare, and we found out that baby #2 was on his way! Hmmm. Now, I am one of those weird people who actually like working, dare I say love working, but I always thought that when I had kids I would stay home with them. So, after baby boy arrived, we made the move to Stay At Home Mommy. Unbelievably to me, it wasn't one fun thing after another to be home. Seriously, I was not expecting to even occassionally be ready to run out of the back door! (Come to find out this is pretty normal!) I needed some "me" time and was able to find some in sewing. So, like any good workaholic would do, I went out and bought a bunch of fabric and began sewing what I knew about- baby stuff!

My Mother-in-Law makes blankets for each of her grandchildren. She calls them "Night Nights" and they are treasured by each kid. These blankets are amazing! You can swaddle with them, lay them on the floor for playtime, and later they become best friends for bigger kids.

My second wave of inspiration comes from repeatedly being let down by store bought blankets that shrank up to some shape other than a square, were never big enough to swaddle in the first place, and were just plain baby-ish. I LOVED having one-of-a-kind and handmade items for my babies. People noticed those (and hopefully not my dark-circles) and I loved that they worked.

Being a Mom is work, quite a job that can never be explained until you do it. And if you are lucky enough to be surrounded by great Moms, hopefully you are also learning from them.

Thank you for stopping by my blog. There, I have started.