
In the past few months I have been trying to make a point to try some new things. My newest venture- canning!
My friend and “cousin-in-law,” Helen of Miss Mermaid Shop, used to make me laugh a little because she does things like tend to a garden and chickens, bake her own foods, and even paid attention to when fruits were freshest and would can them. Oh, and she has two young kids and a growing business like me and, I just had no idea how she could do all of these extra things. Well, some of it she had to do because of her daughter’s allergies, but I digress. The canning was optional.
Recently, I started researching canning and after finding some wonderful resources, decided I would try it.
Oh, my, goodness, it is so much fun!
Never have I considered myself a “foodie” as I would love to try to exist on pizza, grilled cheese, PB&J, and pasta. However, I have been paying a lot more attention to what we feed ourselves as we try to feed our kids better. Afterall, why would we not care what we feed ourselves but care what we feed our kids? That’s food for thought.
High fructose corn syrup, artificial colors numbered whatever, chemical names I don’t know, and who knows what else. If I can control what goes in, it will be better for us, right?
This project is a little more expensive initially than the others I have shared, but in the long run, I believe it will save you money if you enjoy doing it and capitalize by purchasing supplies in season.
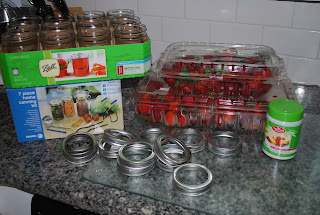
After surfing the net, I had my list of needed tools:
Jar lifter
Funnel
Magnet wand (every project should require a wand)
Rack
Jars
I went to a local kitchen store, Panhandlers Kitchen Supply (mom-owned!), hoping to find a great kit and hopefully clarify some of the process in my head. (Tip: When starting a new project, I love finding local experts to get information and tips. Going to big stores is practically useless for this, as they just sell stuff and don’t do it themselves.) Audrey, store owner, had the perfect kit with stainless steel parts (including the funnel, they are plastic in the popular Ball kit available at Walmart) and was able to answer my questions.
Here is what I asked:
1. Sterilizing jars- Do I sterilize them and then heat them up while I’m making the jar contents? Yes and most dishwashers have a “sanitary” cycle. You can use that.
2. Can I use a regular pot I already have? Yes. It is just important for water to go over the jars for the sealing process.
3. When I finish the sealing process, can I just keep the jars on a shelf? Yes.
She also introduced me to the University of Georgia web site on canning: National Center for Home Food Preservation. This web site has more information that one person could ever digest (yes, I had to insert a food pun) on canning.
My main resource for making Strawberry Jam was The Pioneer Woman's site- easy and fun to read, pictures, and humor. Great resource! I am not going to reduplicate her pictures and post on the process, just add some notes about how to do this with a kid. Links to her posts are below.
Ingredients I used (combo of what Pioneer Woman and The UGA site recommended):
5.5 cups of Mashed Strawberries (this took about 4 lbs)
7.5 cups of sugar
1 box powdered pectin
Lemon juice (I cheated and used the bottled kind)
Basic Steps:
1. Gather materials and ingredients. With jam making, things are more time sensitive than other cooking adventures, so its important to get your ingredients measured out as much as possible before you start. So, measure out your sugar, lemon, and pectin (if you aren’t using a box) and set it aside.
2. Read through Pioneer Woman: Making Strawberry Jam Part 1 and Part 2. (I will sum up some of what I did in relation to her directions and those from the National Center for Home Food Preservation
3. Wash your jars. I washed them by hand and then sterilized them in boiling water (Put on rack in pot. Turn on heat. After the water starts to boil, leave them in for 10 minutes.). This saved me a little time since I didn’t have to wait for the dishwasher. I put the jars back in the pot to warm them up for jarring too.
4. Hull the berries. I let what I cut off fall onto the cutting board. One kid picked up the cutting and put it in the compost jar. The other was handed the cut berry to put it in the pan. (He actually ate every 5th berry or so, and lost interest in helping very quickly. Oh to be two!) this is how our pan looked when we were down prepping the berries. (Pioneer Woman did this is stages, but we hulled, mashed, and measured all at once)


5. Mash the berries. We used a lasagna pan instead of a cookie sheet because I thought it would be easier to keep the berries contained while we mashed. It did. I recommend pulling your berries from the fridge about an hour or so before you plan to mash them as it makes it easier to mash when they aren’t cold. She and I had to alternate mashing.


7. Follow the Pioneer Woman pictorial and directions for making and jarring the jelly. I let my helper stir the pot of berries and ingredients. Then her daddy came home and she lost interest in making jam and I was left to my own to finish. (I was all torn up, really :)) All I had left to do was pour the jelly into the jars without eating it all first.


8. I sealed the jars according to Pioneer Woman's directions (which were the same as every other resource I checked).
9. Wait for the symphony of pops! Seriously, this part was wonderful. Now, try not to eat all the jam at once.
I so didn’t believe Pioneer Woman when she said “Canning has a way of making everything better” and I can see how this is going to be a new hobby. I was seriously amazed at the sense of accomplishment and yumminess that resulted from these couple of hours in the kitchen.
Here is the result, before I made all the jars pretty with a fabric accent, and after we had devoured one jar.

Looks delicious and fun, Carrie. It brings back memories for me. Question: Can you substitute Agave Nectar or Stevia for the sugar?
ReplyDeletePhyllis
Directly from the UGA resource: http://www.uga.edu/nchfp/how/can_07/jellied_product_ingredients.html
ReplyDeleteSugar
Sugar is an important ingredient in jellied fruit products. It must be present in the proper proportion with pectin and acid to make a good gel. Sugar is the preservative for the product, preventing the growth of microorganisms. It also contributes to the taste of the product. Never cut down on the amount of sugar a recipe calls for unless syrup is the desired end result.
Granulated white sugar is usually used in homemade jellied fruit products. Sweeteners such as brown sugar, sorghum and molasses are not recommended since their flavor overpowers the fruit flavor and their sweetness varies.
Light corn syrup or light, mild honey can be used to replace part, but not all, of the sugar. or best results, use tested recipes that specify honey or syrup.
Artificial sweeteners cannot be substituted for sugar in regular recipes because the sugar is needed for gel formation.